
Pickup Documentation


|
Pickup Documentation |

|
Pickup facilitates resizing and uploading images to the news directory. Its main screen (shown here) allows you to select the image file, specify the required output width and quality, and then process the file to produce an image for the notice board.
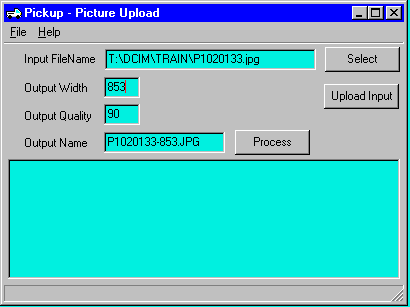
To select a file you can enter the file name in the Input box or click Select which will display the standard Windows box for selecting a file. Input files must be JPEG or TIFF image files.
Once the input file is specified the output width and quality can be changed if required. The width must be the desired width in pixels. The output quality can be from 70 to 100 but should be left at 90 unless you have a good reason to change it.
The Output Name will be based on the Input Name and Output Width but can be changed if required. This name should not be too long (say 32 characters max) and preferably not contain any spaces or special characters as such names may cause problems when uploaded making the file impossible to access or remove.
When Process is clicked the width and height of the output image will be displayed in the log window.
Notice the Upload Input button. This will upload all selected files without any processing. This is useful when you want to upload the original images as well as resampled copies.
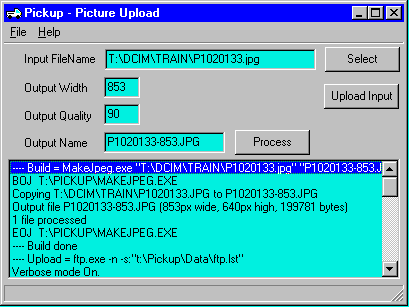
This screenshot shows the line listing the output width and height. These are the two values you need for the HTML tag that will reference the image. The other required value is the output filename which is shown in the Output Name box.
This program (called Pickup) will resize an image file and upload it to the news directory on the server so it can be included in the news page. The text here describes how to install this program on your PC and then specify the settings so it will upload to the correct location.
To obtain the program visit pickup.htm and click on the Download link at the end of the page. When the security box is displayed click the button labelled Open or Run (exact label depends on the browser you are using) so the file will be downloaded and run.
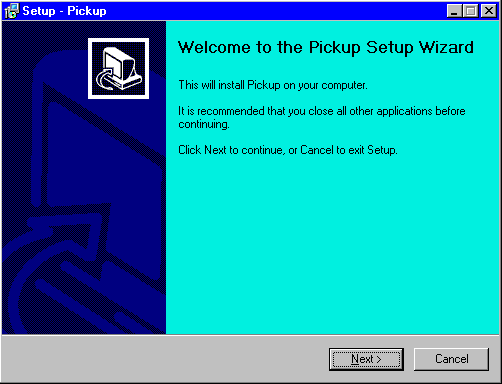
This is the first screen for the installation program.
This program will run and require confirmation for all the default choices and then it will install and run the Pickup program. I recommend that you accept all the default settings unless you have a good reason to change them. Also, please do not untick the 'Launch Pickup' box in the final screen as the next step is to run Pickup and enter the FTP settings.
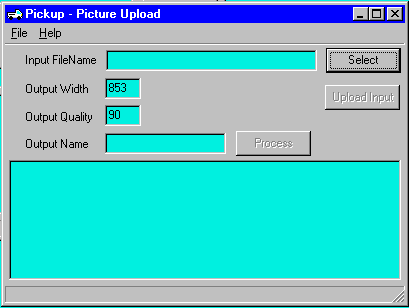
Here is the display when Pickup starts.
The final step in this installation process is to specify the settings for the FTP server and FTP account so files can be uploaded correctly. To do this click on File then Edit Settings to access the entry box.
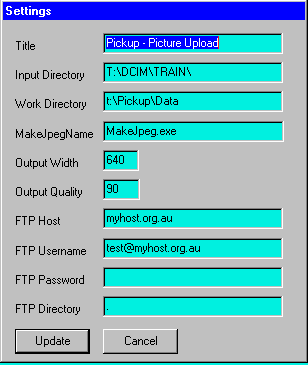
Here is the Edit Settings entry box.
The four FTP entries must be loaded here. The entries above these will not match the display here but should be left as is.
FTP Host is the FTP host domain name.
FTP Username is your username.
FTP Password is your password.
FTP Directory must be '.' (root directory) or the path for the destination directory.
When the FTP entries have been loaded click Update to save the values and return to the Pickup screen.
To test Pickup you can now try a test upload. To do this you must select an image file, specify the output size and name, and then click Process.
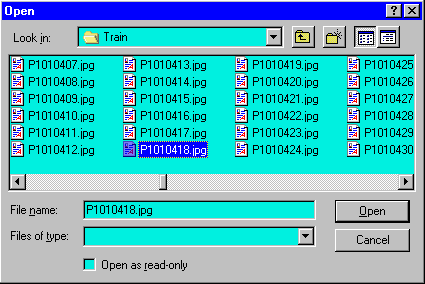
To select a file, click on the Select to display the File Open box, then find a JPEG image file and select it.
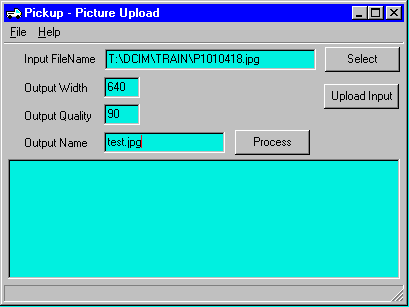
Once you have selected a file and clicked Open you should key in the output width (use 640 for this test) and also the output name (use test.jpg for this test) and then click Process.
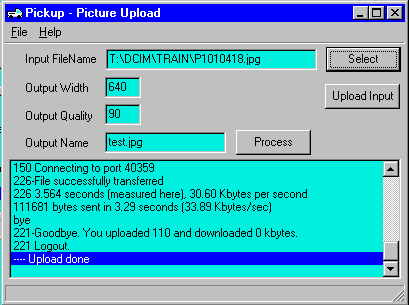
The image will be resampled (to create the specified width) and the file will be uploaded to the FTP upload directory. The log of this processing will be shown in the log window and you can use the scroll bar to see all the lines (if you feel so inclined).

To see the uploaded enter your site name followed by '/test.jpg' (e.g. http://mysite/test.jpg) in your browser and the result should be a 640 pixels wide copy of your image.
Values required for program runs are stored in the Pickup.ini file. This file is normally kept in the directory containing Pickup.exe but this can be changed by specifying a different working directory when starting the program.
Most of the values in this file can be modified via the Edit Settings function in Pickup. The entry names in the Edit Settings form are very similar to the entry names in the INI file. Changing the INI file while the program is running is not recommended.
Lines in the INI file are either comment lines that start with ";" or value lines that contain "name=value". Spaces before the name or between the name and the value will cause problems.
Title=Pickup - Picture Upload
InputDir=E:\ATTACH\
WorkDir=t:\Pickup\Data
MakeJpegName=MakeJpeg.exe
OutputWidth=320
OutputQuality=90
FTPName=ftp.exe
FTPHost=myhost
FTPUser=myuser
FTPPass=secret
FTPDir=.
JobMethod=0
RmtMkDir=1
FileExtension=.JPG
| Name | Default value | Notes |
|---|---|---|
| Title | Pickup - Picture Upload | heading in display window |
| InputDir | . | latest directory for selected files |
| WorkDir | . | directory for resampled files |
| MakeJpegName | MakeJpeg.exe | program used to resample images |
| OutputWidth | 320 | last output width entered |
| OutputQuality | 90 | last output quality entered |
| FTPName | ftp.exe | program used to upload files |
| FTPHost | destination site for uploads (blank disables uploads) | |
| FTPUser | username for FTP login | |
| FTPPass | password for FTP login | |
| JobMethod | 0 | 0 = resample and upload file by file 1 = overlap resampling and uploading when multiple files |
| RmtMkDir | 1 | 0 = don't try to create directories on remote machine 1 = create directories before uploading images |
| FileExtension | .JPG | extension appended to names for uploaded files |